Lesson 5: Letter Raa (Sahpe 1)
Letter Raa (Sahpe 1)
Introduction
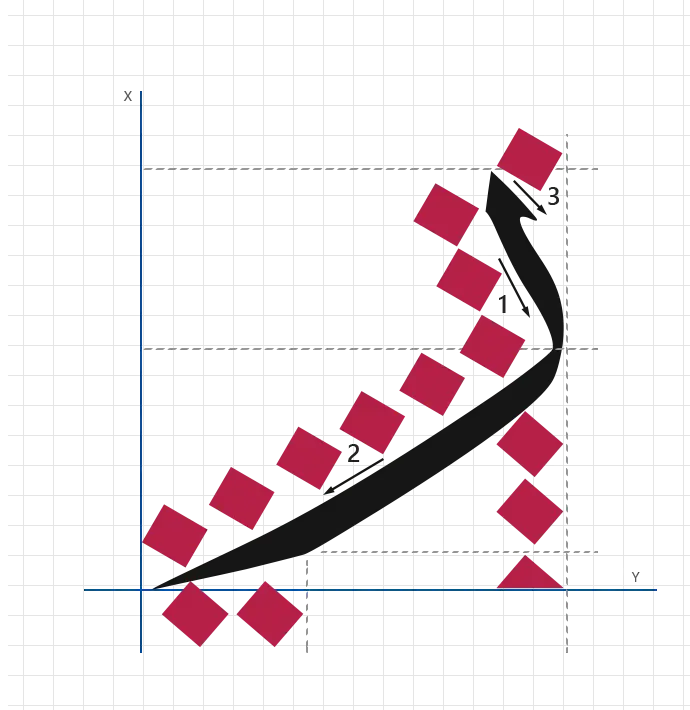
In this lesson, you will learn how to write the Arabic letter Raa using the Thuluth calligraphy style.
Raa is a symbol of simplicity and grace in Arabic calligraphy. Its beauty comes from its smooth flow, soft curves, and balanced proportions. Practicing Raa helps students develop strong control over curved motion, vertical balance, and elegant stroke endings, which are essential skills in Thuluth writing.
Letter Data
- Letter: Raa
- Script: Thuluth
- Form: Shape 1
- Total strokes: 4
- Pen angle: 70°
- Total length: Based on nuqta measurements
Stroke Details
Stroke 1:
- angle: 70°
- direction: Downward (vertical)
- length: 3 nuqta (height)
- width: 1 nuqta
- pressure: Medium and steady
- description: Draw a short vertical stroke to establish the starting point of the letter.
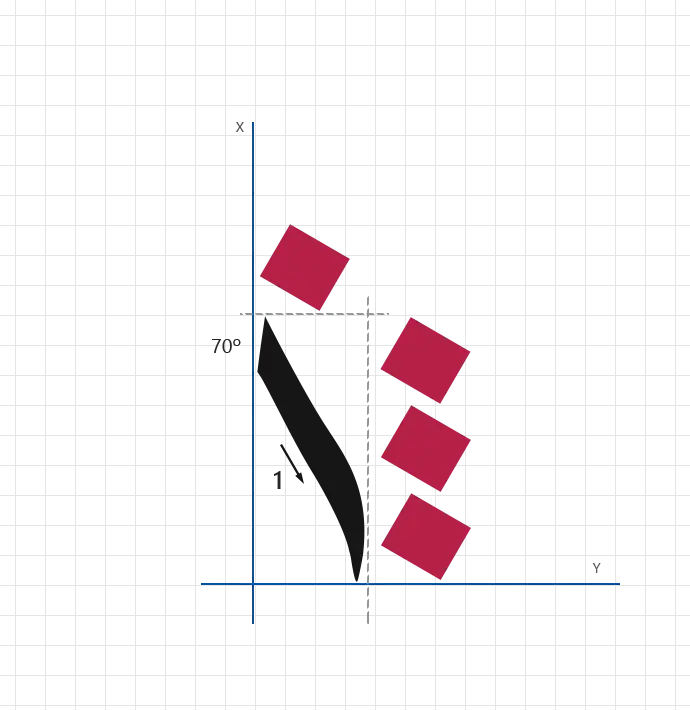
Stroke 2:
- angle: 70°
- direction: Downward then gently upward into a curve
- length: 6 nuqta (total height)
- height above baseline: 2.5 nuqta
- pressure: Medium
- description: Extend the stroke downward and allow it to rise slightly above the baseline to begin forming the main curve of the letter.
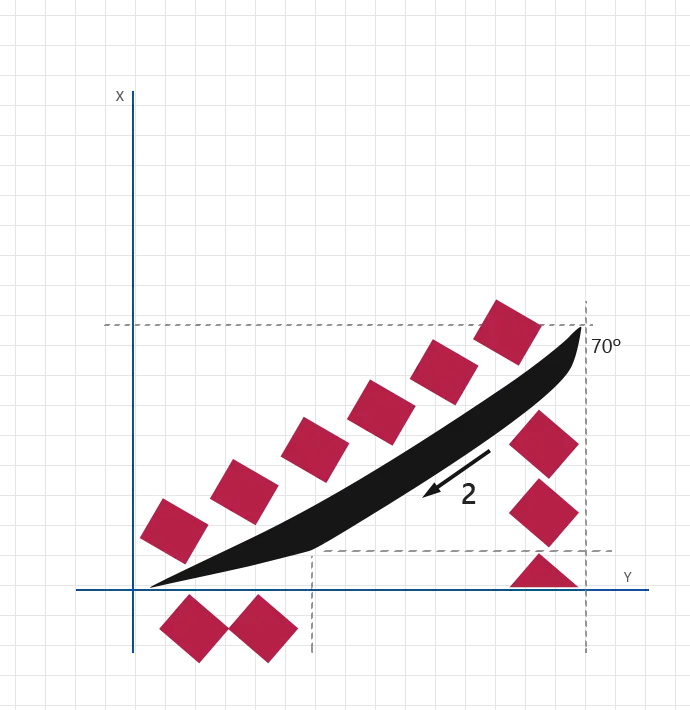
Stroke 3:
- angle: Natural curve
- direction: Flowing curve to the left
- length: 2 nuqta (width)
- pressure: Medium
- description: Complete the main curve of the letter with a smooth, elegant motion, rounding the bottom of the Raa.
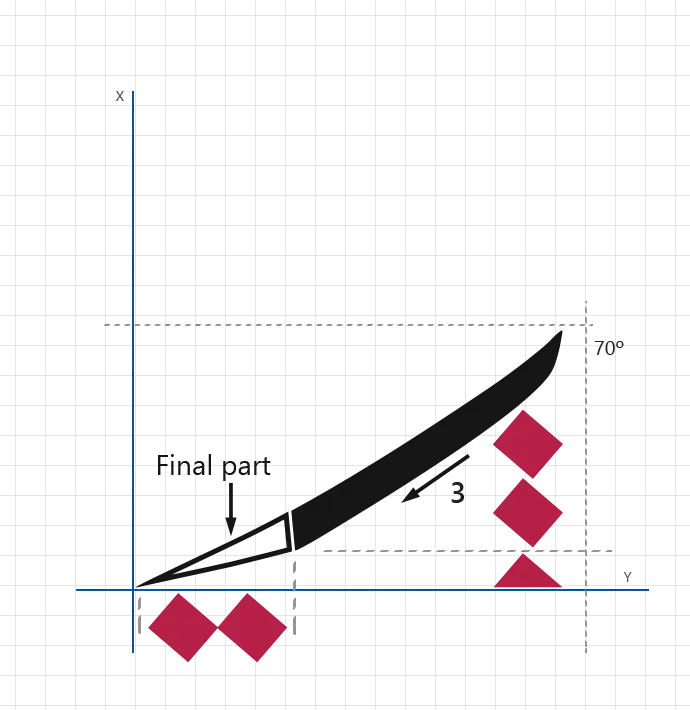
Stroke 4:
- angle: Natural
- direction: Short curved head stroke
- length: 1 nuqta
- height: 1 nuqta
- pressure: Light
- description: Draw the small head stroke to balance the letter and complete its form.
- Vertical opening stroke
- Rising curve foundation
- Curved body and lower finish
- Head stroke
- Curve too sharp or too flat
- Vertical stroke too tall or too short
- Weak or misplaced head stroke
- Uneven thickness
- Broken flow between strokes
Practice Stroke 2 and Stroke 3 together to achieve a natural, continuous curve before adding the head stroke.
Structured Practice Guidelines for Letter Mastery
The "Guidelines for Letter Mastery" table provides a clear and systematic approach for students to practice and refine their Arabic calligraphy skills. It outlines each step, the recommended time allocation, and detailed descriptions to ensure effective and focused practice sessions. This table is designed to help students build consistency, master letter proportions, and develop a strong foundation in Arabic calligraphy.
| Step | Time | Description |
|---|---|---|
| Set Aside Dedicated Practice Time | 15–20 minutes per session | Allocate focused time for practice. Aim for 3–4 sessions per week to build consistency and muscle memory. |
| Understand the Letter's Structure | 2–3 minutes | Review examples and stroke breakdowns. Familiarize yourself with angles, proportions, and key components. |
| Begin with Tracing | 5–7 minutes | Trace the letter on the worksheet to understand its flow and stroke angles. |
| Practice Freehand | 10–12 minutes | Draw the letter freehand using guides. Focus on clean strokes, proportions, and consistency. |
| Refine with Repetition | 5–10 minutes | Repeat the letter multiple times, aiming to improve alignment, spacing, and smoothness. |
| Evaluate Your Progress | 2–3 minutes | Compare your work to the examples on the worksheet. Identify areas for improvement. |
| Incorporate Feedback | As needed | Seek feedback from an instructor or peer and apply their suggestions in future sessions. |
This lesson covers writing the letter Raa with its simple curved form. Students will practice clean stroke endings and consistent thickness.
There are no comments for now.
to be the first to leave a comment.